Monday, June 16, 2014

The Monte Cristo

Monte Cristo Sandwiches: a play on the Croque-Monsieur.
Sandwich Night is not a new concept in my house – it’s a fairly common occurrence, thanks to this blog. The type of sandwich obviously varies, depending on what ingredients are handy and how ambitious I feel.  Last night, ambition was high and so was the excitement level regarding our upcoming move to France. We were feeling French, so it felt like the right time to introduce ourselves to a new sandwich: The Monte Cristo.

The Monte Cristo traditionally is made with ham and cheese, coated in egg and fried. Sound a lot like French Toast, minus the ham and cheese? That’s because it’s also a spin-off of the French sandwich, the Croque-Monsieur, which will get its own post, naturellement.

I was intrigued by its origins, as I am with all the well-known sandwiches I make, so I did a little digging into its past. The Monte Cristo is believed to have been first served in Paris in 1910 and gained popularity when it was served at Disneyland restaurants in the mid-1960s. Apparently, it’s still on the menu at the Tahitian Terrace. It is not to be confused with The Count of Monte Cristo, an adventure novel from 1844 by Alexandre Dumas, unless you consider the joke that in France, this sandwich is served ‘with a vengeance’.

Ooh, la la!

To serve up your own Monte Cristo, you will need: 

-Sandwich bread, your choice (traditionally, it’s made with white bread, but I used a thick rye)
-Strong Cheddar cheese, sliced
-Turkey or Ham slices
Simple ingredients: eggs, milk, bread, mustard, cheese, meat.
-Whole grain Dijon Mustard
-2/3 cup of Milk
-3 Eggs
-1/4 tsp. each fresh Pepper and Thyme leaves
-Butter
-A hot skillet

Prep:

1-Spread a layer of mustard on half of the bread slices.
2-Top with cheese and turkey/ham slices and the other, non-mustard-ed bread slices.
3-In a mixing bowl, beat the eggs, milk, pepper and thyme together.
4-Carefully dip the sandwiches into the egg mixture to coat each side.
5-Melt the butter in the skillet and grill the sandwiches 3-4 minutes each side, until brown.
6-Serve hot, with ketchup, ranch dressing or jelly, as its traditionally served with, for a little extra something sweet.

Très bien!

This fancy French sandwich needs a knife and fork.
I really liked the different textures and flavours of this sandwich: the egg batter made the bread soft but also a bit crispy around the edges and the smoked turkey and strong cheddar complimented themselves well. And in my opinion, everything tastes better with Dijon mustard.

This is a knife-and-fork sandwich, since it’s best when it’s hot off the skillet and feels fancier eating this repas français with utensils. My only recommendation would be to layer the turkey/ham between two slices of cheese for maximum cohesion while grilling. The numerous cheese possibilities are also definitely worth playing with: Gruyere or Emmental would be the top two on my very long list….

Vengeance optional, but couldn’t hurt for authenticity’s sake.  Bon appétit!

For more information on the Monte Cristo, check out:


Sunday, June 1, 2014

Thinking Outside the Bread Box – The Versatile Tortilla

Versatility, thy name is Tortilla.

This statement may come across as overdramatic, but it’s completely true.

The Tortilla is an impressively adaptable substitute for bread for sandwich-type endeavors. This makes sense considering tortillas have been around since the time of the Aztecs. They are traditionally made from corn dough called masa, shaped by hand and seared each side on a hot griddle. Today they come in all sizes and flavors – whole wheat, three cheese, sundried tomato, spinach, etc. -  and they can be stuffed with anything, hot or cold, and shaped into whatever configuration suits your taste.

Versatile tortillas use versatile ingredients.
To prove this and to celebrate the fun and flexibility of the Tortilla, I present you with three different tortilla experiences: a Wrap, a Quesadilla and a Burrito. These three tortilla-based meals can be made with very similar ingredients, depending on what you feel like. If you can't decide which one to make, there's nothing stopping you from making all three at once. Just be creative with what you have and go for it!

The Ranch Chicken Salad Wrap needs:
-Tortillas, any flavor will do
-Romaine or Iceberg lettuce, washed and torn into small bits
-Cooked chicken breast, chopped into small pieces
How stuffed can wraps get?
-Tomatoes, diced
-Red peppers, sliced
-Parmesan cheese, grated
-Ranch Salad Dressing

Prep:

1-Toss the lettuce, chicken, tomatoes and ranch dressing.
2-Spoon the salad mixture into a line down the centers of the tortillas.
3-Sprinkle with Parmesan cheese and add slices of red pepper.
4-Fold up the bottom of the tortilla to the centre and fold the outer ends over each other, leaving one end open.
5-Carefully place the wrap on a plate, folded side down, to keep everything together.
6-Eat it carefully to avoid it coming unwrapped. Enjoy! 

All wrapped up in tortilla goodness.
Two layers of grated cheese tops this quesadilla.
Since wraps are incredibly quick and easy to make, the hardest part will be deciding what to put in yours! Experiment with different fillings, hot or cold, and see how stuffed you can make them. There is another folding technique that completely closes the wrap off, which can be good if the one you’re making is double-stuffed and needs the extra containment. I personally prefer the open end because I can easily top it off with extra wrap stuffing.  Just like the tortillas that hold them all together, wraps are deliciously multipurpose and underrated. 


The Spicy Chicken Quesadilla needs:

-Tortillas, any flavor will do
-Cooked chicken breast, seasoned to your liking and chopped into small pieces
-Cheddar and mozzarella cheese, grated
-Red or green peppers, diced
-Tomatoes, diced
-Banana peppers or *Jalapenos (if you dare!), diced
*If you are chopping up jalapeno peppers, be very careful not to touch your face, especially your eyes, when handling jalapenos! Wash your hands and chopping station thoroughly to avoid unnecessary pain and suffering. Canned jalapenos are a safe alternative as well.*
-Sour cream
-Salsa
-Guacamole (store bought or try making it yourself!)

Prep:

1-Sprinkle a thin layer of grated cheese on half a tortilla.
2-Pile on the chicken, peppers/jalapenos and tomatoes.
3-Top with one more layer of grated cheese.
3-Fold the tortilla in half and carefully place it on a hot Panini press for 3-4 minutes.
4-Remove from heat when golden grill marks are visible and the insides are melted.
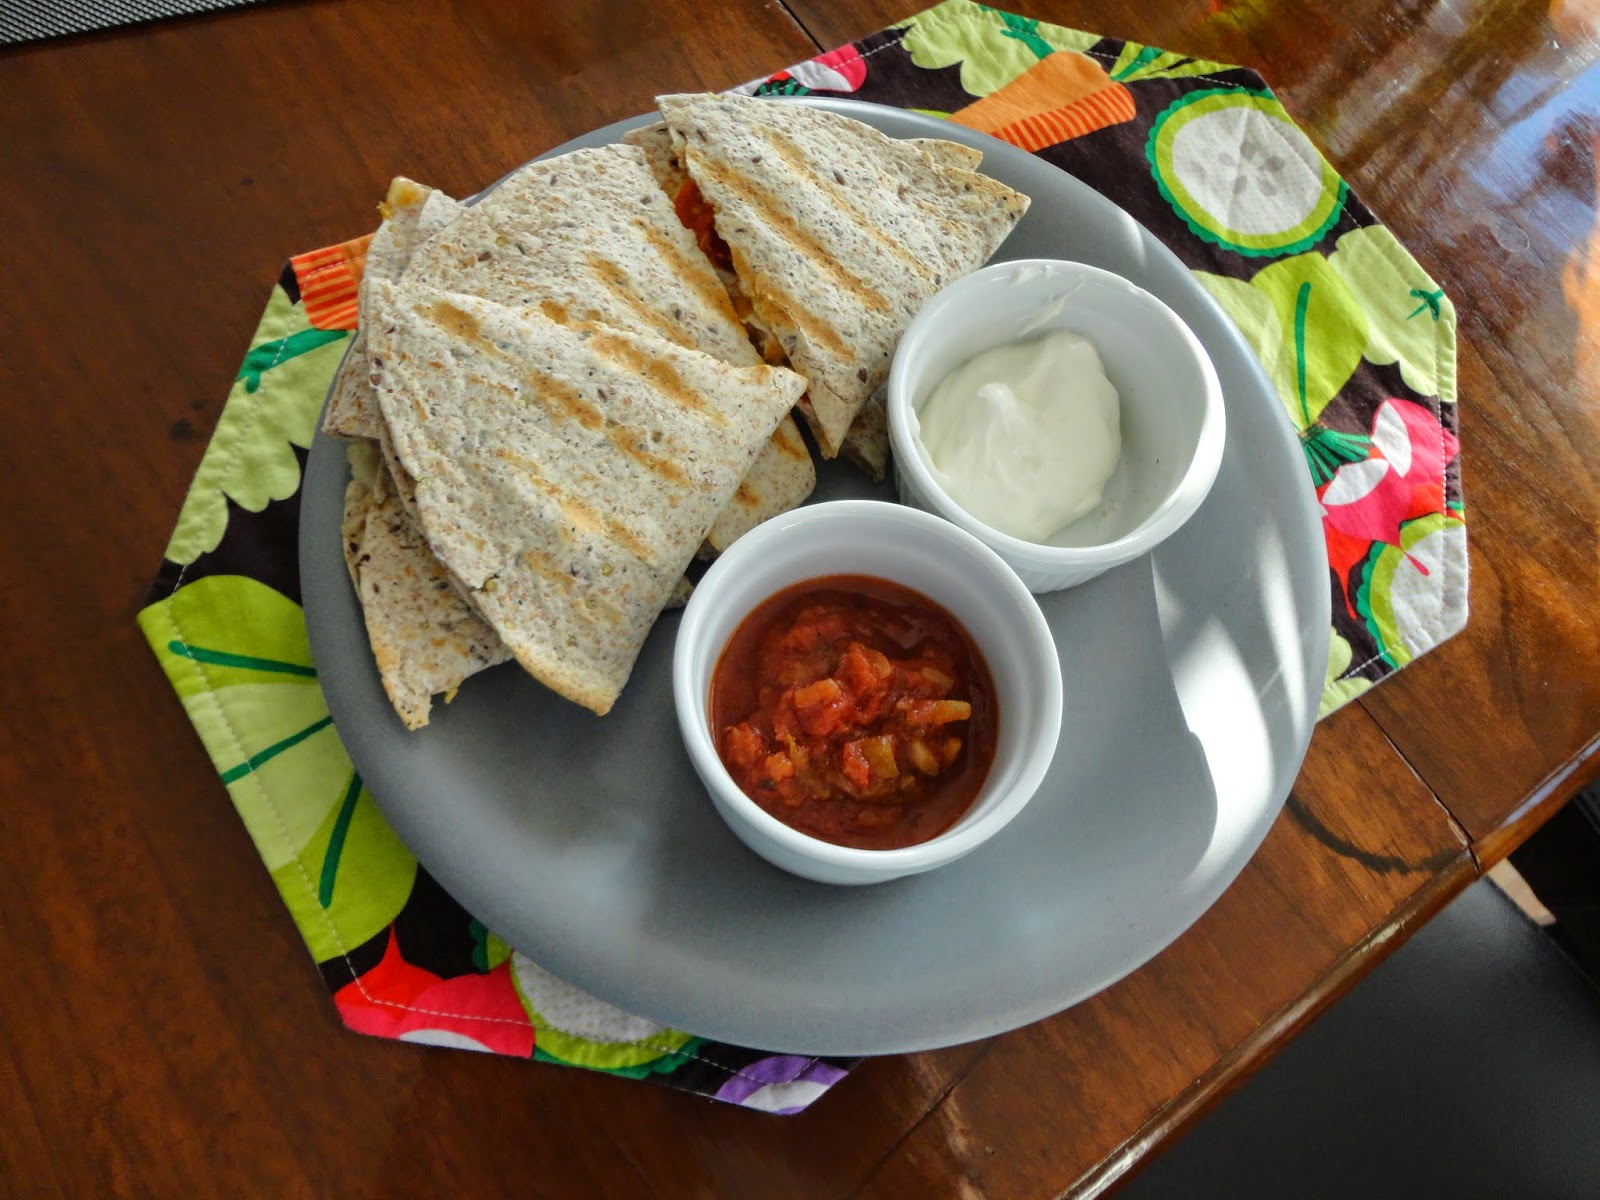
5-Slice the quesadilla into triangles and serve with sides of salsa and sour cream. 

Complete with salsa and sour cream. Guacamole is also a good side.
This Quesadilla makes a filling meal or satisfying snack. I like to season the chicken with some chili or cayenne pepper for some extra oomph. The spicy banana peppers are my favorite part; since I’m not quite ready to go all out with jalapenos, they add some heat without the complete searing of taste buds and don’t make downing ice water a requirement for enjoying this meal. 


Go as spicy as you want!

The Bean Burrito needs:

-Tortillas, any flavor will do
-1-2 cups cooked rice
-1 can of a Bean Medley (red kidney beans, chick peas, etc.)
-1 Tbsp olive oil
-1 small onion, diced
-1 Tbsp minced garlic
-1-2 tsp chili or chipotle pepper (depends how spicy you want it)
-2 tsp cumin
-Sharp cheddar cheese, grated
-Red, green or yellow peppers, diced
-spinach (optional; depends how stuffed you want it)

Stuffed to the brim with rice, beans and veggies.
Prep:

1-Cook the rice per the instructions (if using a rice cooker, make sure you add enough water and a little oil, to avoid the rice drying out/getting crunchy)
2-Add the oil into a heated skillet and sauté the garlic and onion until soft, about 5 minutes.
3-Rinse the beans and add to the oil, garlic and onion.
4-Add the spices and mix to coat the beans evenly. Cook for another 5 minutes or so.
5-Scoop the rice and beans into a line in the center of your tortillas.
6-Pile the veggies and sour cream on top.
7-Carefully fold the bottom up to the centre and fold the outer end over each other.
8-Flip and place folded side down to seal it.
9-Enjoy!

This bean burrito adds a vegetarian option that’s super filling and very healthy.  Experiment with your favorite spices and vegetable toppings to make yours truly unique. You might even want to try seasoning the rice with a splash of lime juice and some chopped fresh cilantro (excellent flavors!). If you're not into beans - you should be because they're tasty and extremely good for you - season chicken or slices of steak with the same spices.


Whether you make it into a wrap, a grilled quesadilla or burrito, your tortilla is sure to please because versatility makes any sandwich experience fun and uniquely yours.